
Tree grafting is a technique of joining two parts of different plants together to form a new plant. The part that provides the root system is called the stock, and the part that provides the desired shoot or fruit is called the scion. Grafting can be used to propagate plants that are difficult to grow from seeds or cuttings, to introduce new varieties or traits, or to repair damaged trees.
Wrapping a tree graft is an important step in ensuring the success of the graft. Wrapping helps to protect the graft from drying out, infection, insects, and weather damage. It also helps to hold the stock and scion firmly together until they heal and fuse. Different types of materials can be used for wrapping, such as plastic tape, rubber bands, waxed cloth, or biodegradable paper. The wrapping should be tight enough to seal the graft but not too tight to constrict the growth of the plant. The wrapping should also be removed or loosened when the graft has healed, usually after a few weeks or months depending on the type of plant and season.
Materials needed for wrapping a graft
To wrap a tree graft successfully, you will need the following materials:
- A sharp knife or pruning shears
- A grafting tape or rubber band
- A grafting wax or sealant
- A pair of scissors
- A label and a marker
Each material has a specific purpose in wrapping a tree graft:
- A sharp knife or pruning shears: You will need this to make clean cuts on both the rootstock and the scion, which are the two parts of the plant that you want to join together. The rootstock is the lower part that provides the roots and support, while the scion is the upper part that provides the desired variety and fruit. The cuts should match in size and shape for a successful graft.
- A grafting tape or rubber band: You will need this to hold the scion firmly to the rootstock after making the cuts. The tape or band should be wrapped tightly around both parts, covering all exposed surfaces. This will prevent air and moisture from entering or escaping, which could cause infection or drying out.
- A grafting wax or sealant: You will need this to cover any gaps or cracks between the scion and the rootstock that are not covered by the tape or band. The wax or sealant will also protect the graft from water, insects, fungi and bacteria that could damage it.
- A pair of scissors: You will need this to cut off any excess tape, band, wax or sealant after wrapping the graft. This will make it look neat and tidy.
- A label and a marker: You will need this to identify your graft with information such as date, type of scion and rootstock, method of grafting and location. This will help you keep track of your grafts and monitor their progress.
Wrapping your tree graft is an important step in ensuring its survival and growth. By using these materials correctly, you can create a strong bond between two different plants and enjoy their benefits for years to come.
Steps for wrapping a graft
In this section we will explain how to wrap a tree graft using different materials and methods.
Step-by-step instructions
- Choose a suitable material for wrapping your graft. There are many options available, such as rubber bands, plastic tape, parafilm, grafting wax, cloth strips and paper bags. The material should be flexible enough to conform to the shape of the graft union, but strong enough to hold it firmly in place. It should also be water-resistant and breathable to prevent rotting or suffocation of the tissues.
- Cut or tear off a piece of your chosen material that is long enough to cover the entire length of the graft union and overlap slightly at both ends. If you are using rubber bands or plastic tape, you may need to stretch them slightly before applying them.
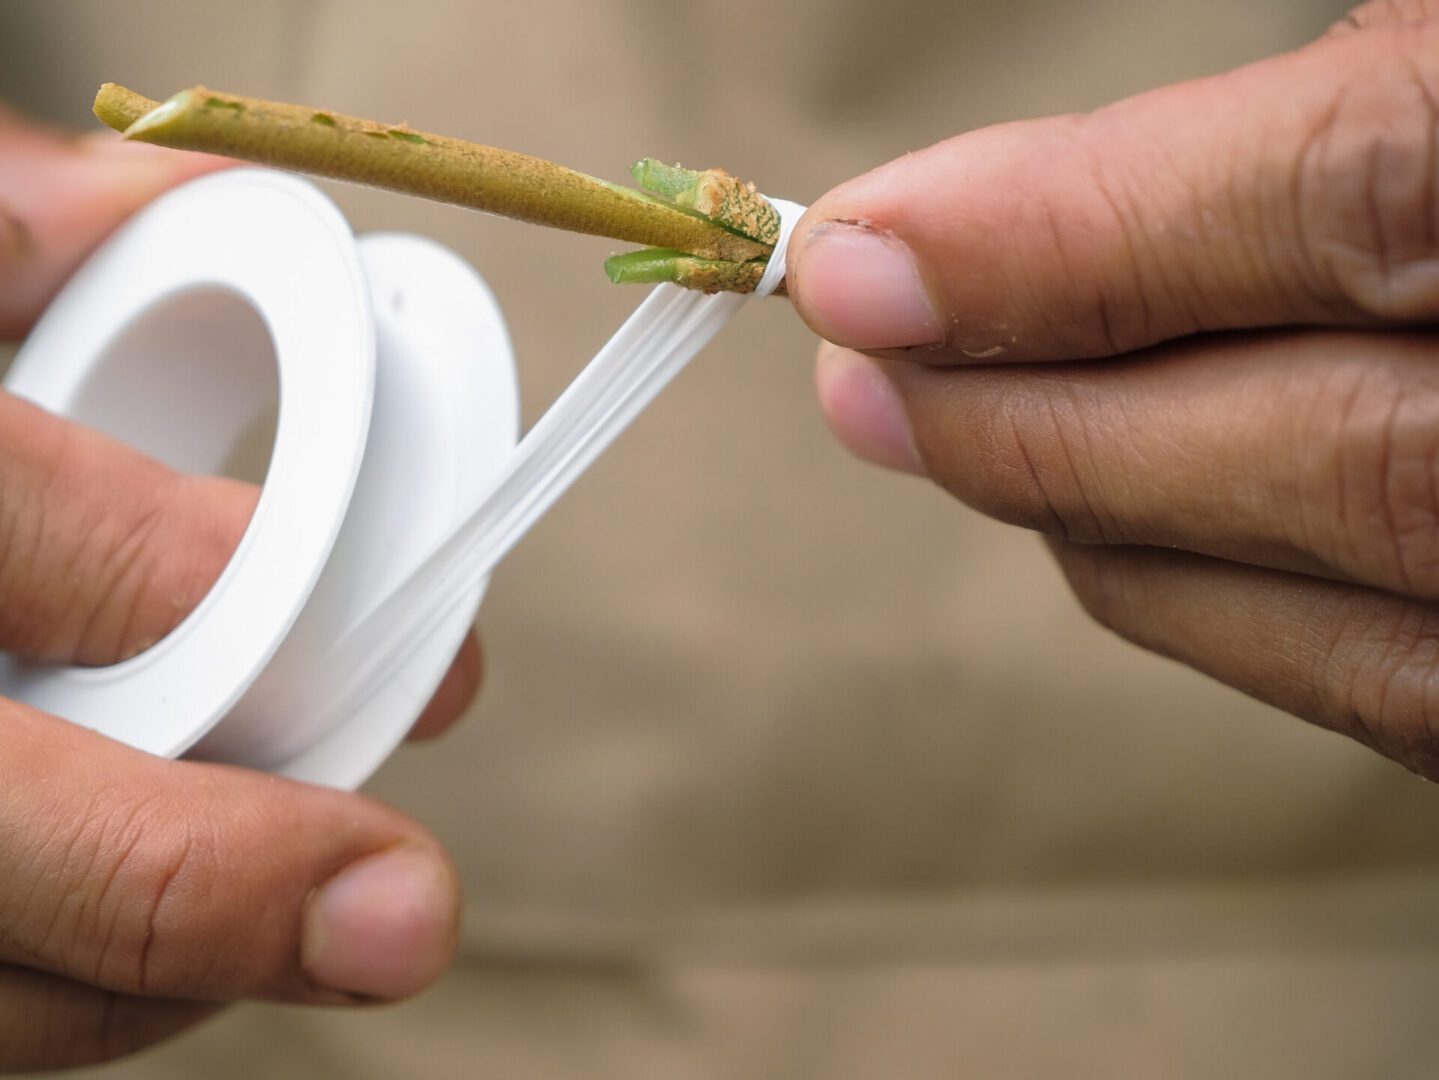
- Start wrapping from the bottom of the graft union and work your way up towards the tip of the scion (the upper part of the grafted plant). Overlap each turn by about half an inch (1 cm) and make sure there are no gaps or wrinkles in the material.
- When you reach the tip of the scion, wrap around it once or twice and then tuck in or cut off any excess material. If you are using rubber bands or plastic tape, you may need to tie a knot or use a staple to secure them.
- Check that your wrap is tight enough to hold the graft union together, but not too tight that it restricts blood flow or causes damage to the tissues. You should be able to slide a fingernail under it without much resistance.
- Label your grafted tree with its name and date of grafting for future reference.
Tips and tricks
- Choose a material that matches the color of your scion as much as possible to reduce sunburn risk.
- Avoid using materials that contain chemicals or adhesives that may harm your grafted tree.
- If you are using parafilm, moisten it slightly before applying it for better adhesion.
- If you are using cloth strips or paper bags, soak them in water before applying them for better flexibility.
- If you are using grafting wax, melt it over low heat and apply it with a brush while it is still warm. Be careful not to burn yourself or your grafted tree.
- Monitor your grafted tree regularly and remove any dead leaves or shoots from the scion. You may also need to prune any suckers from the rootstock (the lower part of the grafted plant) if they appear.
- Remove your wrap after about 6 weeks when you see signs of healing at the graft union. You can use scissors or a knife to cut through it carefully without damaging your grafted tree.
Wrapping your tree graft is an essential step in ensuring its success and survival. By following these steps and tips, you can protect your grafted tree from various threats and help it grow into a healthy and productive plant.
Caring for a wrapped graft
Grafting requires careful preparation, execution and aftercare. One of the most important steps in grafting is wrapping your tree graft. Wrapping helps to protect the graft union (the point where the scion and rootstock join) from drying out, infection and damage.
In this section, we will share some tips on how to care for a wrapped tree graft, as well as some signs that indicate if your grafting was successful.
Maintenance Tips
- Choose the right material for wrapping your tree graft. You can use special grafting tape, rubber bands or strips of cloth. Avoid using materials that are too tight or too loose, as they can either strangle or expose your graft union.
- Wrap your tree graft securely but not too tightly. You want to create a seal around the graft union that prevents air and water from entering or escaping. But you don’t want to cut off circulation or cause swelling in the tissues.
- Recheck your wrap every few days and adjust it if needed. Your wrap may loosen or crack over time due to temperature changes, growth or movement. Make sure your wrap is still intact and covering the entire graft union.
- Remove your wrap when your tree graft has healed. This may take anywhere from a few weeks to a few months depending on the type of grafting, the season and the weather conditions. You can tell if your tree graft has healed by looking for signs of callus formation (a thickened layer of tissue) around the cut edges.
- Protect your tree graft from pests and diseases. Even after removing your wrap, you should monitor your tree graft for any signs of infection or infestation by insects or fungi. You can apply fungicides or insecticides if necessary, but be careful not to damage the delicate tissues.
Signs of Successful Grafting
- Your scion shows signs of growth such as buds, leaves or flowers. This means that it has established a connection with the rootstock and is receiving water and nutrients.
- Your scion matches well with the rootstock in terms of size, shape and angle. This means that you have made a good cut and aligned them properly.
- Your scion does not wilt, dry out or rot away. This means that it has survived any stress factors such as cold, heat or drought.
- Your scion produces fruit that resembles its original variety. This means that it has retained its genetic identity and characteristics.
If you follow these tips on how to care for a wrapped tree graft, you will increase your chances of success and enjoy the benefits of having multiple varieties on one tree.
Conclusion
In conclusion, wrapping a tree graft is a crucial step in ensuring the success of the grafting process. Wrapping protects the graft from drying out, infection, and physical damage. It also helps to maintain a tight contact between the scion and the rootstock, which facilitates the healing and fusion of the tissues. Therefore, it is highly recommended to use a suitable material and technique to wrap a tree graft carefully and securely.