Bud grafting, also known as chip budding or T-budding, is a technique of propagating plants by inserting a bud from one plant into the stem of another. This method allows you to create new plants that have the same characteristics as the parent plant, such as flowers, fruits or foliage. Bud grafting is commonly used for roses, fruit trees and ornamental trees.
Here are seven steps to perform bud grafting successfully:
Step 1
Choose a healthy and vigorous rootstock plant that has a compatible species or variety with the scion plant (the one that provides the bud). The rootstock should have a smooth and straight stem that is about pencil-thick or slightly thicker. The scion plant should have well-developed buds that are not too large or too small.
Step 2
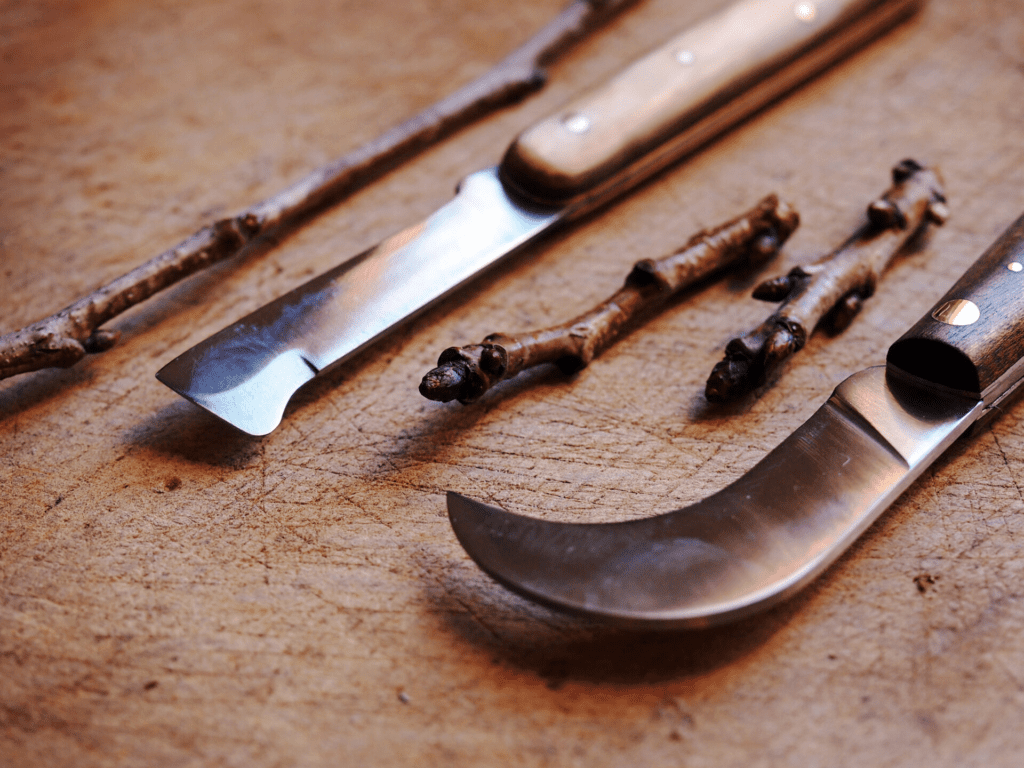
Prepare your tools and materials. You will need a sharp knife, preferably a budding knife with a curved blade and a small notch at the tip; a pair of pruning shears; some grafting tape or rubber bands; and some disinfectant such as alcohol or bleach. Sterilize your knife and shears before use to prevent infection.
Here is a list of required tools and materials:
- Alcohol Wipes or Soap/Water ($5)
- Grafting Knife ($16)
- Pruning Shears or Pruning Saw ($13)
- Rootstock of a Fruit Tree (Free)
- Compatible Buds
- Parafilm or wrapping film ($7)
- Grafting Tape ($8)
Step 3
Cut off a shoot from the scion plant that has several healthy buds. Remove all the leaves except for a small portion at the base of each bud. This will help you identify the buds and prevent them from drying out. Keep the shoot moist by wrapping it in damp paper towels or cloth until you are ready to use it.
Step 4
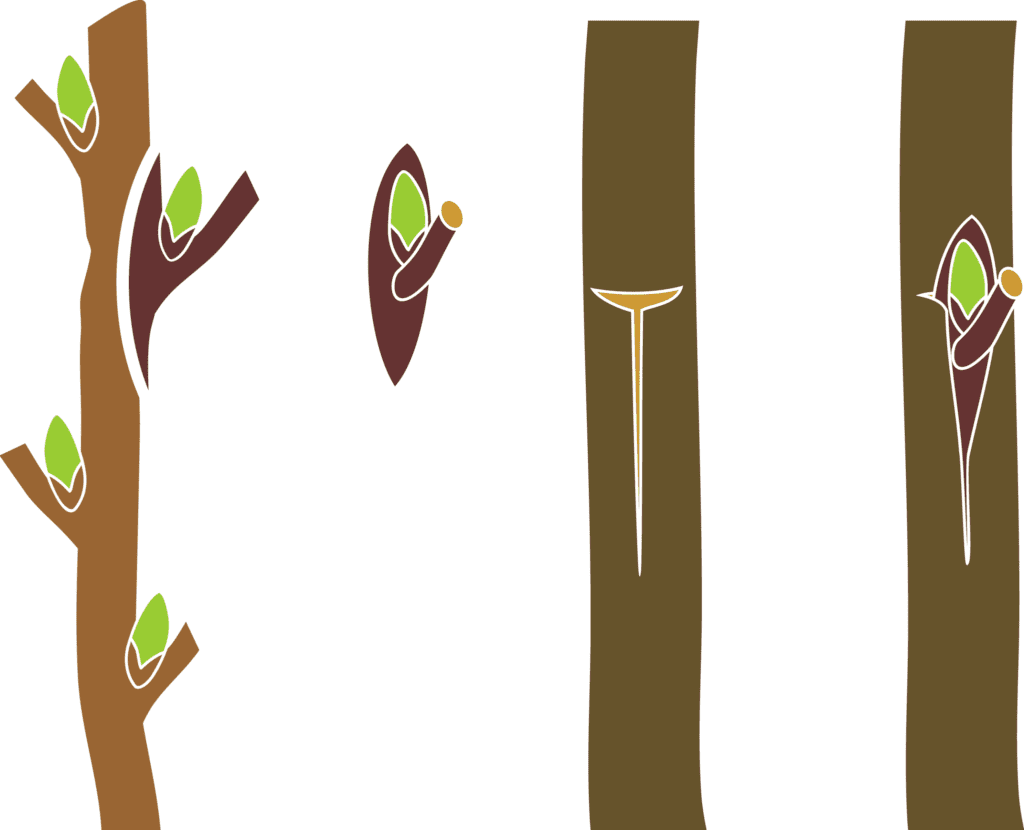
Make a T-shaped cut on the stem of the rootstock plant where you want to insert the bud. The cut should be about 1 inch (2.5 cm) long and deep enough to expose the cambium layer (the green tissue under the bark). Gently pry open the flaps of bark with your knife or fingers to create a pocket for the bud.
Step 5
Cut off a bud from the scion shoot with your knife, making sure to include some bark and wood behind it. The cut should be slightly longer than the T-cut on the rootstock stem, about 1-1/4 inch (3 cm) long. This piece of scion tissue is called a chip or shield.
Step 6
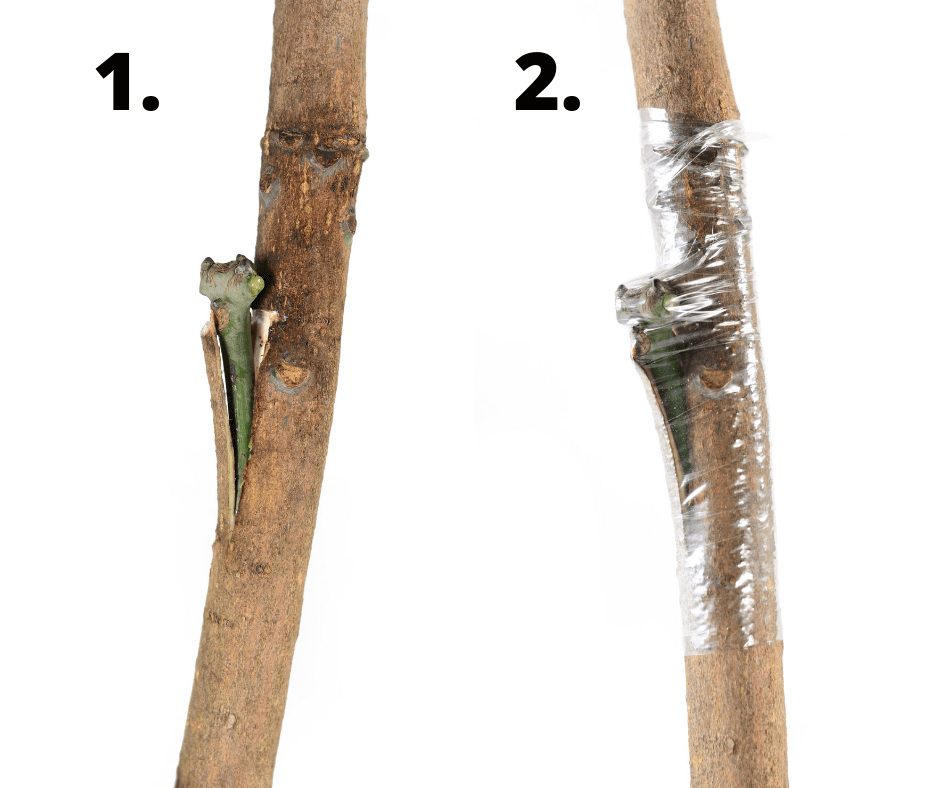
Insert the chip into the pocket on the rootstock stem, aligning it so that its cambium layer matches with that of
the rootstock’s cambium layer. The bud should face upwards and be positioned at about 45 degrees angle from
the vertical axis of the stem.
Step 7
Wrap grafting tape or rubber bands around the grafted area to secure it firmly and prevent moisture loss and air entry.
You have successfully performed bud grafting! Now you need to take care of your grafted plants until they heal
and grow.
- Keep them in a shaded and humid place for about two weeks, then gradually expose them to more light.
- Remove any shoots or suckers that grow from the rootstock below the grafted area, as they will compete with the scion for nutrients and water.
- Cut off the top part of the rootstock above the grafted area when you see signs of growth from the scion bud, such as swelling, sprouting or leaf formation. This will encourage the development of a strong connection between the scion and rootstock tissues.
Congratulations! You have created new plants by using bud grafting!
Conclusion
Bud grafting is a simple and effective technique for propagating various plants, especially fruit trees. It involves inserting a single bud from a desired scion into a slit made on the bark of a compatible rootstock. The bud then grows and forms a new shoot, while the rootstock provides support and nourishment. Bud grafting can be done in seven steps: selecting the scion and rootstock, preparing the budsticks, making the T-cut on the rootstock, cutting the bud from the budstick, inserting the bud into the T-cut, wrapping the graft with tape or rubber band, and removing the tape or rubber band after healing. By following these steps carefully and choosing the right time and materials for grafting, one can successfully produce new plants with desirable characteristics.